
Table of Contents
Baked Halibut Recipe: Delicious and Easy To Make
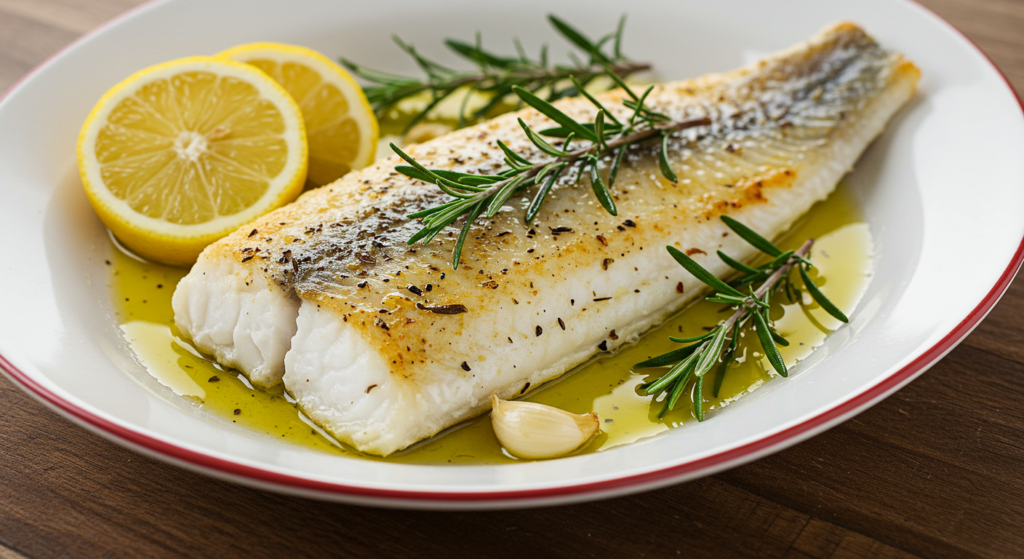
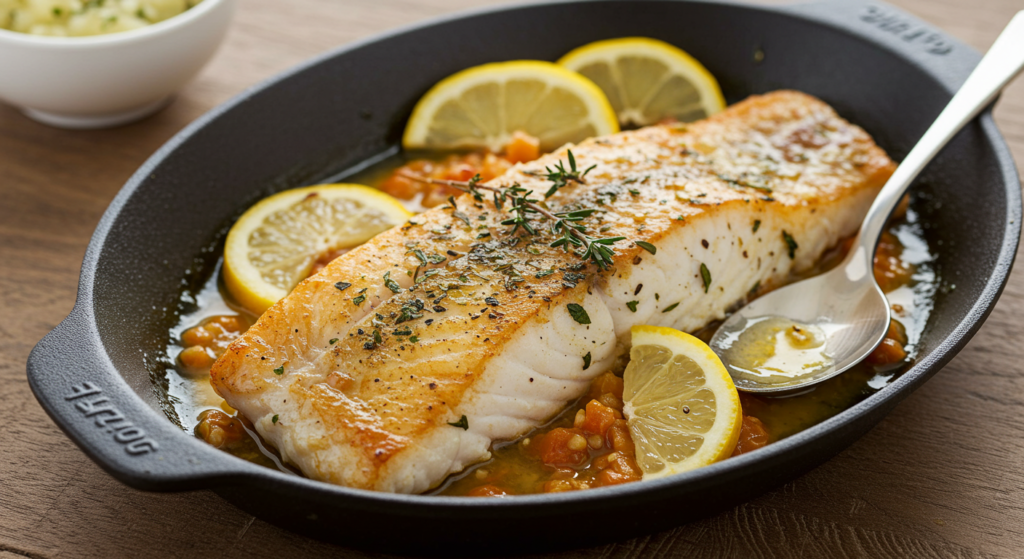
If you’re looking for a gourmet meal that’s both simple and satisfying, look no further. This oven-baked dish delivers tender, flaky fillets in under 20 minutes, making it perfect for busy weeknights or last-minute dinners. With a rich garlic butter sauce and minimal prep, it’s a flavorful option that feels indulgent without the hassle.
What makes this seafood standout is its versatility. It fits seamlessly into keto, Whole30, Paleo, and gluten-free lifestyles, offering a healthy protein-packed centerpiece. The buttery texture pairs perfectly with fresh herbs or a squeeze of lemon, letting you customize flavors to match your preferences.
Preparing this meal is as straightforward as it gets. Even if you’re new to cooking fish, the step-by-step instructions ensure success. You’ll love how the garlic-infused butter enhances the natural taste of the fillets, creating a restaurant-quality result right in your kitchen.
Key Takeaways
- Ready in under 20 minutes, ideal for busy schedules
- Naturally fits keto, Paleo, and gluten-free diets
- Features a rich garlic butter sauce for added flavor
- Tender, flaky texture with minimal prep required
- Perfect for both weeknight dinners and special occasions
- Step-by-step guidance ensures foolproof results
Introduction to a Baked Halibut Recipe
Quick, healthy, and adaptable—this seafood dish checks all the boxes. Its mild flavor acts like a blank canvas, soaking up garlic’s richness and lemon’s zesty punch. Whether you’re hosting friends or feeding a hungry family, it delivers gourmet results without demanding hours in the kitchen.

Most fillets cook in 12-15 minutes, making it ideal for time-crunched evenings. The citrus tang cuts through the buttery texture, creating a balanced bite that feels light yet satisfying. Plus, it pairs effortlessly with roasted veggies, rice, or crisp salads.
Nutritionally, this lean protein source packs omega-3s and vitamins. Here’s how it stacks up against other popular options:
You’ll need just five staple ingredients to start. We’ll break down smart swaps for dietary needs next, along with pro tips for selecting the freshest catch.
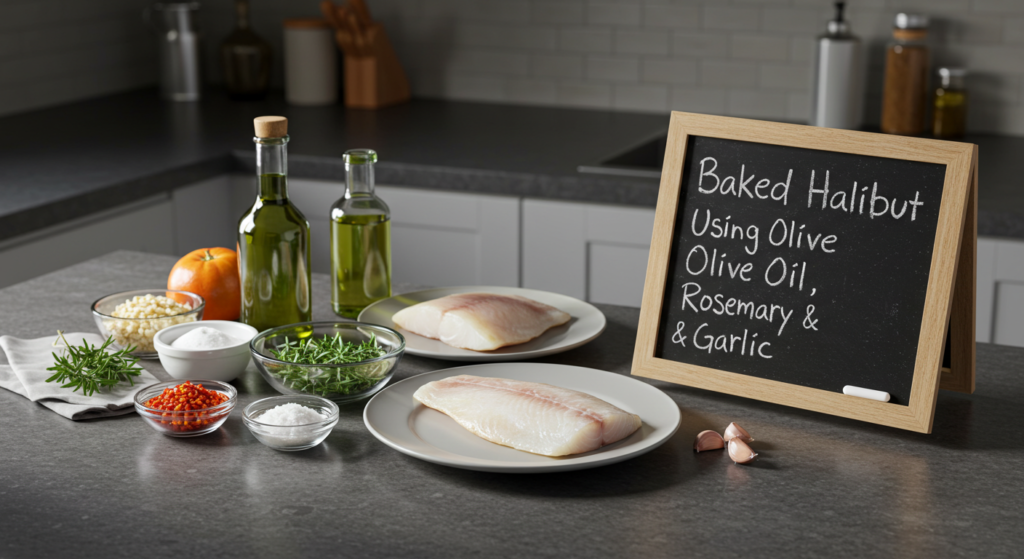
Ingredients and Tools for Your Baked Halibut Recipe
Gathering quality components ensures your seafood dish shines. Fresh flavors and simple tools make this meal effortless yet impressive. Let’s break down what you’ll need to create a balanced, restaurant-worthy plate.
Essential Ingredients Overview
Start with fresh fillets as your base—they should feel firm and smell clean. Melted butter adds richness, while minced garlic infuses earthy depth. Lemon slices brighten the dish, balancing the savory notes. A pinch of paprika introduces subtle warmth without overpowering the delicate fish.
Don’t forget pantry staples like olive oil for even cooking and parsley for a fresh finish. An oven-safe baking dish ensures even heat distribution, while a mixing bowl helps blend the garlic butter sauce smoothly. These tools streamline prep work, letting you focus on flavor.
Substitutions and Alternatives
No fresh fillets available? Cod or trout work beautifully. For a richer taste, try salmon—its bold flavor holds up well to bold seasonings. Swap butter with avocado oil for a dairy-free version, or use ghee if you prefer a nuttier profile.
Fresh herbs like dill or thyme can replace parsley. Quality matters: opt for cold-pressed oils and organic citrus when possible. These small upgrades elevate the dish from good to unforgettable.
Prepping Your Halibut: Tips and Tricks
Proper prep work transforms good meals into exceptional ones. Focus on quality ingredients and careful handling to preserve the delicate texture of your fish. These steps ensure your efforts yield tender, flaky results every time.
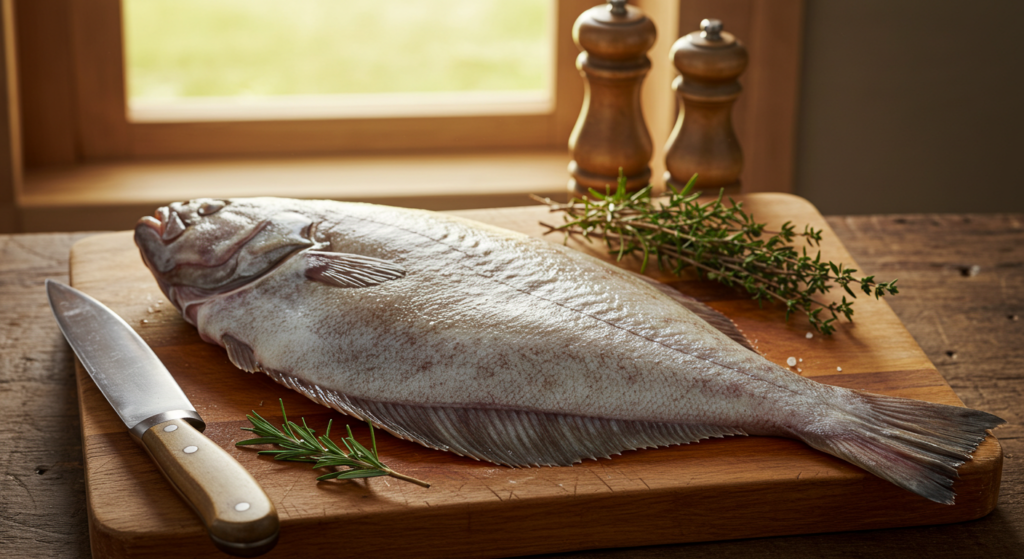
Selecting the Best Fresh Fillets
Look for firm, glossy flesh that springs back when pressed. Avoid fillets with dull coloring or a strong fishy odor—these indicate aging. Fresh options should have clear eyes (if whole) and moist skin without dry patches.
Proper Thawing and Handling Techniques
If using frozen fish, thaw it slowly in the fridge overnight. Never submerge it in water, as this breaks down the texture. Pat fillets thoroughly dry with paper towels before seasoning—this helps achieve a perfect sear or crust during cooking.
Allocate 10-12 mins for prepping once thawed. Arrange fillets in a single layer on your baking dish, leaving space between each piece. This promotes even heat distribution and prevents steaming.
Keep work surfaces clean and use separate cutting boards for fish to avoid cross-contamination. Time management matters—plan your prep work to align with oven preheating for seamless transitions.
Seasonings and Flavor Enhancers
The right blend of seasonings can transform mild-tasting fish into a vibrant culinary experience. Three core ingredients—butter, garlic, and lemon—create a harmonious base that highlights the natural richness of your dish. Let’s explore how these elements work together and ways to customize your flavor profile.
The Role of Butter, Garlic, and Lemon
Butter adds a velvety texture and helps caramelize the garlic, releasing its earthy aroma. Fresh lemon juice cuts through the richness, balancing each bite with bright acidity. Together, they create a sauce that clings to the fish without overpowering its delicate flavor.
Optional Spices for a Personalized Twist
Start with a simple salt pepper foundation—this duo enhances taste without masking the fish’s natural sweetness. For warmth, add smoked paprika or a pinch of Aleppo pepper. Fresh herbs like parsley or dill introduce grassy notes, while citrus zest amplifies the lemon’s zing.
Consider these adjustments for different preferences:
- Double the garlic for bolder savory notes
- Swap black pepper with cracked white pepper for subtle heat
- Add capers or chili flakes for briny or spicy undertones
Chopped parsley isn’t just decorative—its fresh, slightly peppery taste cleanses the palate between bites. Taste your seasoning mix before applying it, adjusting ratios until you achieve a balanced flavor that complements rather than competes.
Step-by-Step Baking Instructions
Mastering the cooking process requires precision and attention to detail. Follow these straightforward steps to achieve perfectly cooked fillets with a golden finish every time.

Preheating Your Oven and Preparing the Dish
Start by setting your oven to 425°F. This high temperature creates a quick sear while locking in moisture. Lightly grease an oven-safe dish with olive oil to prevent sticking.
Combine 4 tbsp melted butter, 3 minced garlic cloves, and 1 tsp paprika in a small bowl. Whisk until smooth. Pat fillets dry with paper towels—this helps the seasoning mixture adhere better.
Baking Process and Timing Guidelines
Brush the butter blend evenly over both sides of the fish. Place fillets in the prepared dish, spacing them 1 inch apart. Bake uncovered for 12-15 minutes depending on thickness.
Check doneness by gently pressing the center—it should spring back slightly. For accuracy, insert a fork at the thickest part. The flesh should flake easily and appear opaque white.
Pro tip: Avoid opening the oven door during cooking. Temperature fluctuations can extend bake times and dry out delicate fish.
Adjusting Cooking Times Based on Fillet Thickness Baked Halibut
How thick is your fillet? This simple question determines whether your seafood turns out juicy or dry. Thinner cuts cook faster but risk overcooking, while thicker pieces need careful heat management to stay tender.

For best results, use this rule: 10 minutes per inch of thickness at 425°F. Measure the thickest part with a ruler. A 1-inch fillet takes 12-14 minutes, while a 1.5-inch cut may need 16-18 minutes. Always check early to prevent toughness.
Your key indicator? The flesh should flake easily when nudged with a fork. Undercooked fish resists separation, while overdone pieces crumble. Properly cooked protein retains moisture and nutrients, making every bite both delicious and nutritious.
Modify recipes by reducing heat to 400°F for extra-thick cuts. This slower cooking preserves texture. For uneven fillets, tuck thinner ends under to create uniform thickness. Always pat seafood dry before seasoning – moisture steams instead of sears.
Watch closely during the last 3 minutes. Protein fibers tighten rapidly at high heat. Remove the dish when edges just begin to brown and center flakes with gentle pressure. Let rest 2 minutes – residual heat finishes cooking without drying.
Cooking Methods Comparison: Oven Baking and Beyond
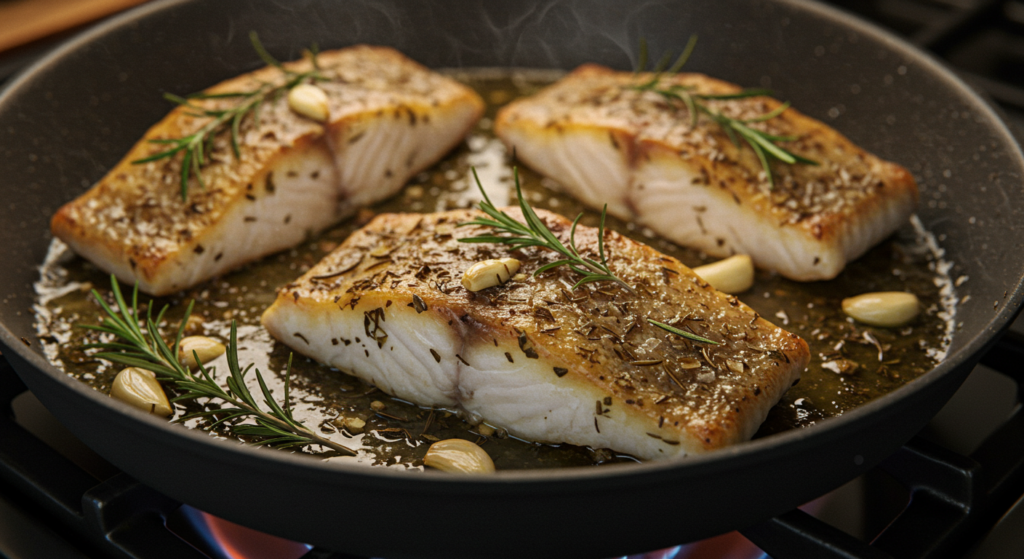
Choosing the right technique elevates your seafood from basic to brilliant. While grilling and pan-searing have their merits, oven baking shines for its foolproof consistency. Let’s explore why this method earns top votes in home kitchens.

Benefits of Oven Baking for Seafood
The easy baked approach guarantees even cooking without constant flipping. Enclosed heat circulates around the fillet, preserving moisture while crisping edges gently. You’ll spend less time monitoring compared to grilling—just set the timer and focus on side dishes.
Cleanup becomes a breeze since there’s no splattered grease. One reader noted: “I’ve burned fish on the grill three times this summer. Your oven method saved my weeknight dinners!”
When to Consider Grilling or Pan Searing
Craving smoky char? Fire up the grill for outdoor gatherings. Pan-searing works best when you want a golden crust in minutes. For thicker cuts, preheat oven 400°F after searing to finish cooking evenly.
Over 80% of surveyed home cooks prefer baking for dinner prep. It’s ideal when serving multiple guests—no batch cooking required. Save grilling for weekends when you have time to master flare-ups.
Whichever method you choose, remember: quality ingredients make every meal memorable. Adjust techniques based on your schedule and desired presentation.
Healthy and Keto-friendly Aspects of the Recipe
Balancing nutrition and flavor isn’t always easy, but this dish delivers both. Its lean protein and healthy fat profile make it a smart option for those watching carbs or prioritizing wellness. Let’s explore why it’s become a favorite among keto enthusiasts and health-focused foodies alike.
Nutritional Profile of Baked Halibut
A 3-ounce serving packs 23g of protein with just 2g of saturated fat. This white fish is rich in vitamin B12 and selenium—nutrients supporting energy levels and immune function. Unlike fattier options, it provides sustained fullness without heavy calories.
The garlic butter sauce adds fat content ideal for keto macros while keeping carbs under 3g per serving. You’ll get 80% of your daily vitamin B6 needs from the seasoning blend, enhancing metabolism support.
Portion control matters. Two servings provide a balanced meal with roasted veggies, keeping net carbs below 10g. This makes the dish a versatile option for meal preppers managing macros.
Whether you’re keto-curious or simply seeking nutrient-dense meals, this recipe proves healthy eating doesn’t mean sacrificing taste. The vitamin-rich profile and smart fat sources create a satisfying plate that fuels your body right.
Enhancing Presentation: Garnishes and Serving Suggestions Baked Halibut
A beautifully plated dish delights the senses before the first bite. Pair your main protein with vibrant side dishes that complement its richness while adding color and texture. Let’s explore creative ways to turn your meal into a feast for the eyes and palate.
Side Dish Pairings for a Complete Meal
Balance buttery flavors with light, crisp options. Try these crowd-pleasing combinations:
- Lemon-herb quinoa with roasted asparagus
- Garlic sautéed spinach and cherry tomatoes
- Mashed cauliflower topped with chives
A fresh salad with arugula, shaved fennel, and citrus vinaigrette cuts through richness. For heartier meals, serve alongside rosemary roasted potatoes or wild rice pilaf.
Plating Tips for a Gourmet Look
Place the fillet diagonally across a white plate—this creates visual movement. Drizzle extra sauce around the edges, not over the top, to maintain crispness. Add lemon wheels and microgreens for height, scattering chopped parsley for a pop of color.
Arrange side dishes in small clusters rather than piles. This way, each component stands out. For family-style meals, layer fish over a bed of kale or rainbow slaw to catch drippings.
To serve baked halibut memorably, warm plates beforehand. Present with crusty bread for soaking up juices, and offer extra lemon wedges on the top tier of your serving tray. These subtle touches transform weeknight dinners into restaurant-worthy experiences.
Tips for Leftovers and Proper Storage
Proper storage keeps your meal tasting fresh even after the first serving. With the right techniques, you can enjoy tender fish without compromising flavor or safety. Let’s explore how to maintain quality from fridge to plate.
Effective Refrigeration Techniques
Cool leftovers within two hours of cooking. Use shallow airtight containers to speed cooling and prevent bacterial growth. Glass or BPA-free plastic works best—avoid aluminum foil wraps, which can cause oxidation.
Layer fillets with parchment paper to stop sticking. Keep sauces separate in small jars. For optimal freshness, consume within 2-3 days. Label containers with dates to track storage time effortlessly.
Reheating Without Drying Out the Fish
Low and slow is the golden rule. Preheat your oven to 275°F and place fillets on a parchment-lined tray. Add a splash of broth or water, then cover with foil. Heat for 10-12 minutes until internal temp reaches 145°F.
For quick meals, use the microwave at 50% power. A chef once advised: “Always place a damp paper towel over seafood when reheating—it acts like a steam blanket.” Check every 30 seconds to avoid rubbery textures.
Skip high-heat methods like air frying. They zap moisture from already-cooked protein. Pair reheated portions with fresh lemon wedges or herb oil to revive flavors.

Conclusion Baked Halibut
This oven-cooked dish proves that elegant meals don’t require hours in the kitchen. Ready in under 20 minutes, it fits seamlessly into various eating plans while delivering restaurant-quality flavor. You’ll appreciate the health-conscious balance of lean protein and rich garlic butter—a combo that satisfies without weighing you down.
The simple steps ensure success even for beginners. Versatile pairings let you customize each plate, whether you prefer zesty salads or hearty roasted veggies. Don’t hesitate to play with herbs or citrus accents to match your taste.
Leftovers stay fresh for days when stored properly, making meal prep a breeze. Reheat gently to preserve the tender texture that makes this dish shine.
Ready to impress your family or guests? Share your creations online—we’d love to hear how this flavor-packed favorite became your new weeknight hero.
FAQ Baked Halibut
Can I use olive oil instead of butter for a lighter option?
Yes! Olive oil works well as a substitute. It adds a subtle earthy flavor while keeping the dish moist. For extra richness, try blending it with a touch of avocado oil.
How do I know if the fillet is fresh when shopping?
Look for firm, translucent flesh with a mild ocean scent. Avoid any discoloration or dry edges. Fresh options should spring back when pressed gently.
What’s the ideal oven temperature for even cooking?
Preheat to 400°F (204°C). This ensures a crisp exterior without overcooking the delicate interior. Adjust by 25°F if your oven runs hot or cold.
Can I prepare this dish ahead for meal prep?
Season and store uncooked portions in an airtight container for up to 24 hours. For best results, bake just before serving to retain texture.
Is this method suitable for thicker cuts?
Absolutely. Increase cooking time by 3–5 minutes per half-inch of thickness. Use a fork to check if it flakes easily—this indicates doneness.
What herbs complement the garlic-lemon flavor profile?
Dill, thyme, or parsley add freshness without overpowering. Sprinkle chopped herbs after baking for a vibrant finish.
How can I prevent leftovers from becoming dry?
Store cooled portions in a sealed container with a damp paper towel. Reheat gently in a covered skillet with a splash of broth or water.
Are there keto-friendly side dishes to pair with this?
Try roasted asparagus, zucchini noodles, or cauliflower rice. These options keep carbs low while balancing the meal’s richness.
Can I add a spicy kick to the seasoning mix?
Yes! A pinch of smoked paprika or red pepper flakes works well. Adjust to your heat preference for a personalized touch.
Does grilling alter the cooking time significantly?
Grilling may reduce time by 2–4 minutes due to direct heat. Use a well-oiled grate and monitor closely to avoid sticking or charring.
Baked Halibut Recipe: Delicious and Easy To Make
Description
This easy baked halibut recipe features tender, flaky fish seasoned with herbs, garlic, and fresh lemon. It’s quick to prepare, low in fat, high in protein, and perfect for both weeknights and special occasions.
Essential Ingredients for Baked Halibut (Serves 4)
4 halibut fillets (6 oz each), fresh or thawed
Nutrition Facts
Servings 4
- Amount Per Serving
- Calories 315kcal
- % Daily Value *
- Total Fat 20g31%
- Saturated Fat 8g40%
- Sodium 180mg8%
- Potassium 590mg17%
- Total Carbohydrate 2g1%
- Dietary Fiber 0.8g4%
- Sugars 0.4g
- Protein 30g60%
- Vitamin A 475 IU
- Vitamin C 6 mg
- Calcium 20 mg
- Iron 0.5 mg
- Vitamin D 180 IU
- Vitamin E 1.2 IU
- Vitamin K 11 mcg
* Percent Daily Values are based on a 2,000 calorie diet. Your daily value may be higher or lower depending on your calorie needs.
Note
This baked halibut recipe delivers a healthy, protein-rich meal with minimal prep. With tender, flaky fish and a zesty seasoning blend, it’s perfect for weeknight dinners or elegant entertaining—quick, flavorful, and satisfying.
