

Table of Contents
5 Perfect Cooked: Seasoned Crispy Chicken Drumsticks

Imagine biting into a dish that’s crunchy on the outside, tender on the inside, and bursting with flavor. This recipe for perfectly cooked poultry has become a household staple, loved for its simplicity and crowd-pleasing results. Whether you’re hosting a family dinner or craving a satisfying meal, these drumsticks deliver every time.
Key Takeaways
- Master a family-friendly dish with minimal prep time
- Achieve restaurant-quality texture using basic kitchen tools
- Customize flavors with adaptable seasoning combinations
- Learn baking tricks to prevent dryness
- Discover meal-pairing ideas for any occasion
Introduction to Seasoned Crispy Chicken Drumsticks
When it comes to crowd-pleasing proteins, few options deliver both convenience and taste. These bone-in cuts shine for their juicy texture and forgiving nature during cooking. Their built-in handles make them ideal for casual gatherings, while their affordability keeps grocery budgets intact.

The Appeal of Chicken Drumsticks
Why do home cooks love this cut? The dark meat stays moist even at higher temperatures. Unlike leaner options, it withstands longer cook times without drying out. Families appreciate how effortlessly they adapt to various flavor profiles—from smoky barbecue to zesty herb blends.
Proper preparation starts with preheating your oven to the right temperature. This step ensures even cooking and prevents rubbery skin. Many recipes fail because they skip this crucial detail, but getting it right guarantees golden results every time.
Why This Recipe Stands Out
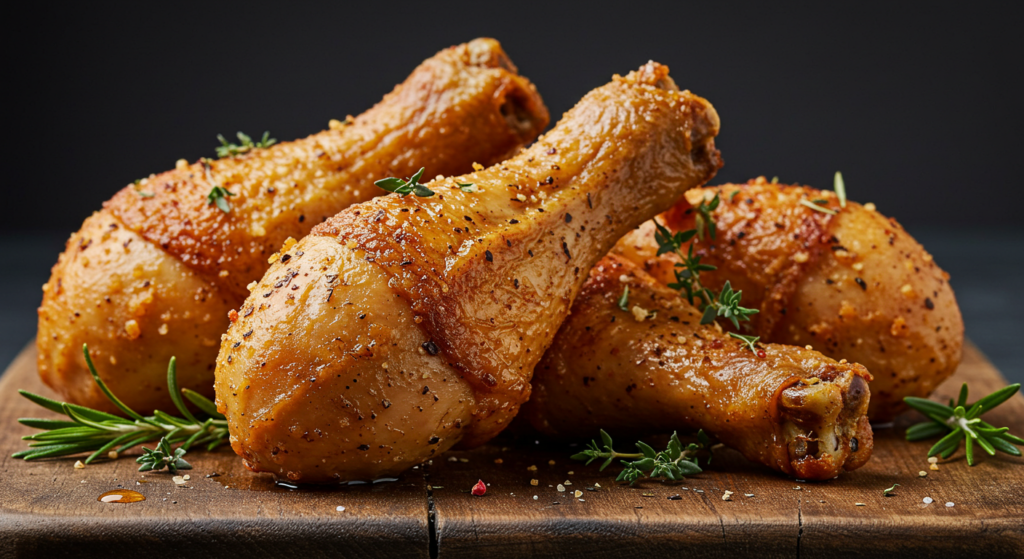
The magic lies in the timing and spice balance. A 45-minute bake at 400°F creates that crave-worthy crunch. Combining garlic, paprika, and oregano forms a robust crust without overpowering the natural flavors.
One food blogger notes:
“Getting the seasoning ratio right transforms basic poultry into something extraordinary.”
This approach elevates weeknight dinners while keeping prep under 10 minutes. It’s proof that simple techniques can yield exceptional meals.
Key Ingredients & Essential Seasonings
Great meals start with quality components. Your choice of proteins and spices determines whether a dish tastes homemade or extraordinary. Let’s explore what elevates this recipe from basic to memorable.

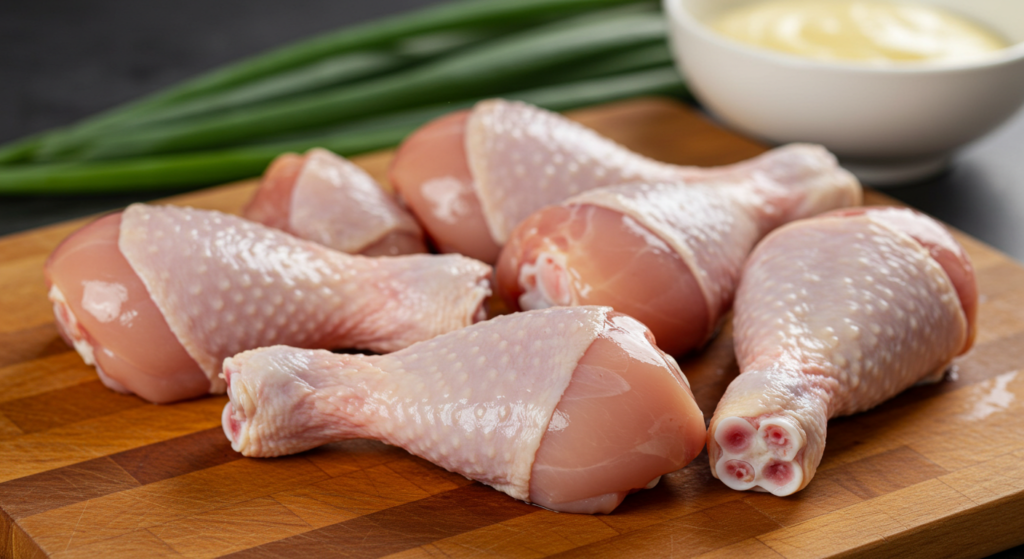
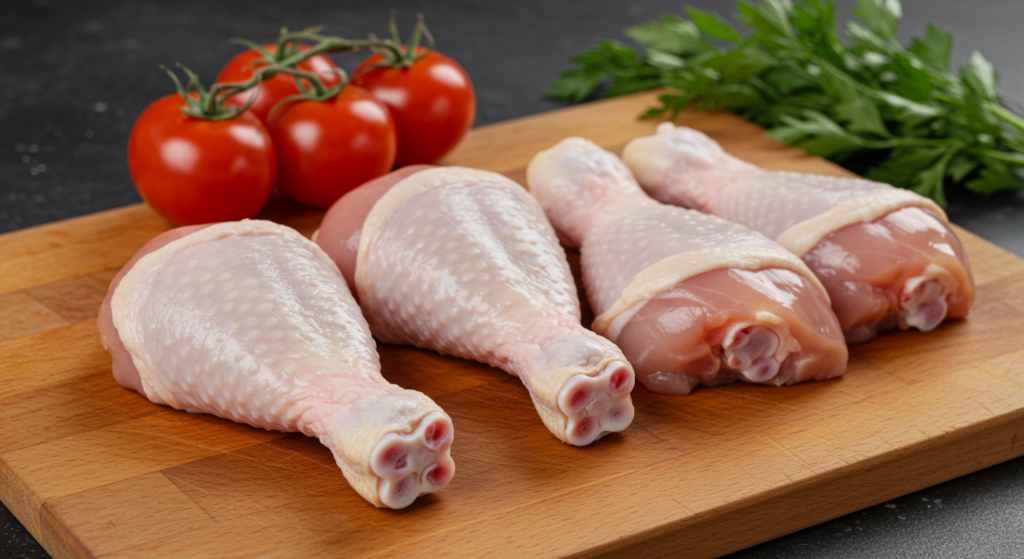
Pasture-Raised Chicken and Fresh Ingredients
Pasture-raised poultry makes a noticeable difference. These birds develop richer flavor through natural diets and movement. Compared to conventional options, they offer higher levels of omega-3s and vitamins.
Always pat your meat dry before seasoning. Moisture prevents spices from sticking properly. Fresh herbs like rosemary or thyme add brightness, but dried versions work if stored correctly.
Seasoning Mix: Garlic, Chili Powder, Oregano, Paprika, and More
The spice blend combines earthy, smoky, and zesty notes. Garlic powder forms the base, while chili adds subtle heat. Paprika contributes color and sweetness, balancing oregano’s herbal punch.
Mix everything in a large bowl for even distribution. A chef once noted:
“Measuring matters—too much salt drowns out other flavors, while too little leaves the dish flat.”
Your oven does the heavy lifting after prep. High heat crisps the skin while locking in juices. Adjust racks to center positions for consistent airflow and browning.
Step-by-Step Preparation Process
The secret to restaurant-quality results lies in mastering these foundational techniques. Each step builds flavor and texture, turning basic components into something extraordinary. Let’s break down the process that ensures golden perfection every time.

Prepping the Chicken: Drying and Refining
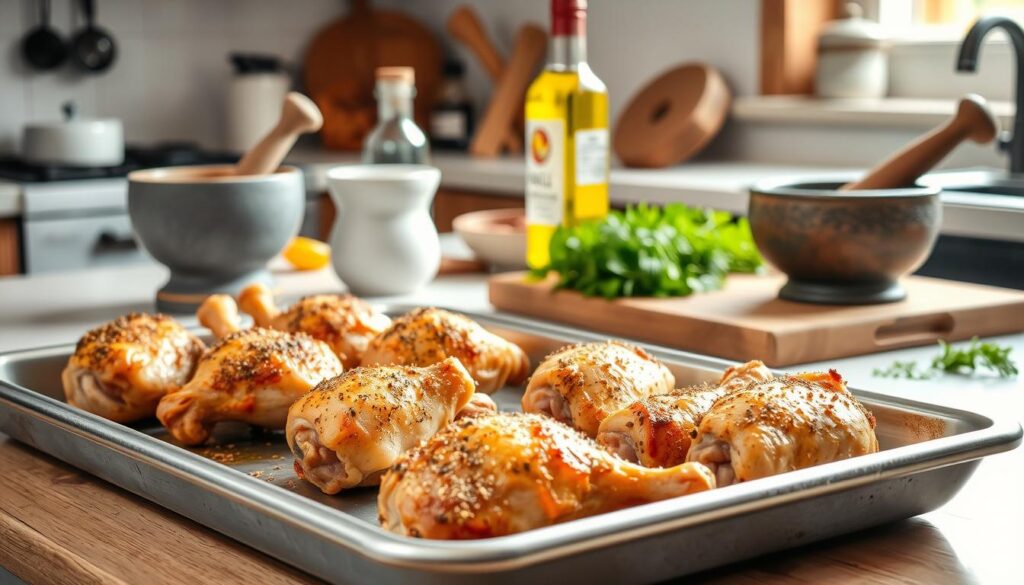
Start by patting your poultry dry with paper towels. Moisture prevents spices from sticking and creates steam during cooking. This simple step makes the difference between rubbery and shatteringly crisp skin.
Remove any excess fat or loose pieces for even browning. Place cuts on a clean cutting board and let them rest at room temperature for 15 minutes. Cold meat straight from the fridge won’t cook as evenly.
Coating with Olive Oil and Seasonings
Drizzle oil over the pieces and rub it into every crevice. This binder helps spices adhere while promoting caramelization. Combine your seasonings in a small bowl first for balanced distribution.
Generously sprinkle the mix, focusing on areas where skin meets meat. Freshly ground pepper adds subtle heat without overpowering. A professional chef once advised:
“Treat seasoning like confetti—cover every surface, but don’t bury the main attraction.”
Place pieces on a wire rack set over a baking sheet. Elevating them allows hot air to circulate underneath. This technique prevents soggy spots and ensures uniform crunch from all angles.
Baking Methods for Crispy Perfection
Achieving that ideal crunch requires more than just good ingredients. Proper techniques turn ordinary meals into standout dishes. Let’s explore how heat management and timing work together to create irresistible textures.
Preheating and Oven Setup
Always start with a fully heated oven. Cold appliances create uneven results. Set yours to 400°F and let it reach temperature before placing food inside. This ensures immediate searing, locking in juices while forming a golden crust.
Use the center rack position for balanced airflow. A baking sheet lined with foil catches drips without steaming the skin. Professional chefs emphasize:
“An oven thermometer is your best friend—many models run hotter or cooler than their displays show.”
Baking Time and Temperature Adjustments
Standard recipes suggest 45 minutes at 400°F. But oven types vary. Convection models cook 15% faster, while toaster ovens need closer monitoring. Check internal temperatures with a meat thermometer—165°F guarantees safety without dryness.
Adjust cooking times based on protein size. Larger pieces may need 5-10 extra minutes. If using salt-heavy rubs, reduce baking time slightly to prevent over-browning. Track progress through the oven window to avoid frequent door openings.
Remember: Ambient humidity affects outcomes. On rainy days, extend baking by 3-5 minutes. These small tweaks make all the difference between good and exceptional results.
Tips for Achieving Extra Crispy Skin
Crafting that perfect golden exterior requires smart techniques and a few kitchen hacks. These expert-approved methods ensure your meal stays juicy inside while developing a crunch that holds up to dipping sauces or reheating.
Using a Rack for Air Circulation
Elevate your baking game with a wire rack over a foil-lined tray. This setup lets heat reach every angle of your protein, preventing steam from softening the surface. The foil catches drips for easier cleanup while maintaining oven temperature stability.
Mix smoked paprika into your spice rub for deeper flavor and richer color. A chef once shared:
“The right paprika variety acts like edible armor—it protects moisture while amplifying crunch.”
Combine it with garlic powder and black pepper for balanced seasoning.
For extra texture, add a teaspoon of baking powder to your dry rub. This alkaline ingredient helps break down skin proteins faster during high-heat cooking. Store leftovers in airtight containers for up to three days without losing crispness—reheat in a 375°F oven for 8 minutes.
Always print your recipe adjustments to track what works best. Small tweaks like adjusting rack height or spice ratios make noticeable differences. With these strategies, you’ll master textures that rival professional kitchens.
Nutritional Benefits & Health Insights
Balancing flavor and nutrition starts with understanding what’s on your plate. These protein-packed cuts deliver essential nutrients while satisfying hunger. Each serving provides a powerhouse of vitamins and minerals that support muscle growth and immune function.
Vitamins, Minerals, and Protein Content
A single leg offers 22 grams of protein—nearly half your daily needs. It’s rich in selenium, which protects cells, and vitamin B6 for brain health. Phosphorus strengthens bones, while zinc boosts metabolism.
Pasture-raised options elevate these benefits. Studies show they contain 50% more omega-3s than conventional poultry. Olive oil adds heart-healthy fats without overpowering the natural flavors.
Your choice of cookware matters. A heavy-duty baking sheet ensures even heat distribution. This prevents nutrient loss from hot spots while keeping the meat tender. Nutritionists note:
“Proper bake minutes preserve up to 30% more B vitamins compared to overcooking.”
Adjust cooking times carefully. At 400°F, 45 minutes maintains moisture while maximizing nutrient retention. Pair your meal with leafy greens to enhance iron absorption from the meat.
Serving Suggestions & Pairing Ideas
Transform your meal into a culinary experience by pairing it with sides that elevate textures and flavors. The right combinations balance richness while letting your main dish shine. Focus on contrasts—creamy, crunchy, or fresh elements create harmony on the plate.

Complementary Side Dishes
For hearty meals, try garlic mashed potatoes drizzled with olive oil. Their smooth texture contrasts beautifully with crispy skin. Roasted broccolini adds earthy notes and a satisfying crunch when baked at high temperature alongside your main dish.
Lighter options? Toss mixed greens with citrus vinaigrette. The acidity cuts through savory flavors. Arrange everything on a rimmed sheet pan for easy serving—this keeps food warm and simplifies cleanup.
Customizing Your Meal
Swap spices to match your mood. Smoked paprika adds depth, while cayenne brings heat. A chef once advised:
“Treat your spice cabinet like an artist’s palette—layer flavors without overwhelming the meat.”
For gatherings, serve with mini cornbread muffins or grilled pineapple slices. Adjust oven temperature slightly if reheating sides alongside your protein. Store leftovers in airtight containers—reheat on a sheet pan at 375°F to preserve texture.
Troubleshooting Common Cooking Challenges
Even experienced cooks face hurdles when preparing protein-rich meals. Understanding common pitfalls helps you achieve consistent results. Let’s address solutions for issues like uneven browning or dry meat.
Avoiding Overcooking and Sogginess
Dryness often stems from incorrect oven temperatures. Use a meat thermometer to check internal temps—165°F is safe, but remove food at 160°F since residual heat continues cooking. If your layer of seasoning falls off, pat the surface drier before applying spices.
For soggy skin, elevate pieces on a wire rack during prep. This allows airflow underneath, preventing steam buildup. One chef recommends:
“If juices pool on the pan, rotate your drumstick halfway through baking.”
Adjust these factors based on your oven’s quirks:
- Reduce bake time by 5 minutes if using convection
- Add 1 tsp cornstarch to spice blends for crunchier coatings
- Rest meat 7 minutes before serving to redistribute moisture
Struggling with uneven doneness? Position larger pieces near the oven’s back side where heat circulates more intensely. For last-minute fixes, broil for 90 seconds to revive texture.
Conclusion : Chicken Drumsticks
Mastering the art of a crowd-pleasing main dish requires both technique and creativity. This recipe proves that simple methods yield impressive results when you nail the essentials. The right balance of powdered spices—like garlic and smoked paprika—creates depth, while precise oven temperatures ensure juicy meat beneath a golden crust.
Line your pan with parchment paper for effortless cleanup without sacrificing texture. Each serving balances flavor with nutrition, clocking in around 210 calories while delivering 22 grams of protein. Want to mix it up? Swap seasonings or adjust heat levels, but keep the core baking method intact.
Whether you’re meal-prepping or hosting friends, these tips guarantee success. Store leftovers in airtight containers and reheat on a wire rack to preserve that satisfying crunch. Ready to make it your own? Grab your spices and let the oven work its magic.
FAQ
How do I prevent the skin from becoming soggy?
Place the pieces on a wire rack over a baking sheet. This allows heat to circulate evenly, crisping the skin. Avoid overcrowding or letting them sit in juices.
Can I use different spices if I don’t have paprika or oregano?
Yes! Customize the blend to your taste. Try cumin, smoked chipotle, or thyme. Just maintain a balanced ratio to avoid overpowering the meat.
What temperature ensures juicy results without drying?
Preheat your appliance to 425°F (220°C). Bake for 35–40 minutes, checking internal temps with a thermometer (165°F/74°C). Adjust times based on size.
Are there healthier alternatives to olive oil?
Avocado oil works well for high-heat roasting. For fewer calories, lightly spray with cooking oil instead of brushing.
How long can I store leftovers?
Keep refrigerated in an airtight container for up to 3 days. Reheat in an air fryer or oven at 375°F (190°C) to restore crispiness.
What sides pair best with this dish?
Serve with roasted veggies, garlic mashed potatoes, or a fresh slaw. For low-carb options, try cauliflower rice or grilled asparagus.
Why is drying the meat important before seasoning?
Patting with paper towels removes excess moisture, helping spices stick better and promoting a golden-brown exterior during baking.
5 Perfect Cooked: Seasoned Crispy Chicken Drumsticks
Description
These seasoned crispy chicken drumsticks deliver golden, shatteringly crisp skin and juicy meat using pantry staples and a hot oven—no frying required, perfect for busy weeknights or weekend gatherings.
Crispy Chicken Drumsticks recipe
8 chicken drumsticks (about 2 lb / 900 g total)
Pantry-Staple Variations & Add-Ins
Nutrition Facts
Servings 4
- Amount Per Serving
- Calories 210kcal
- % Daily Value *
- Total Fat 11g17%
- Saturated Fat 3g15%
- Cholesterol 105mg35%
- Sodium 430mg18%
- Potassium 270mg8%
- Total Carbohydrate 1.5g1%
- Dietary Fiber 0.5g2%
- Protein 22g44%
- Vitamin A 500 IU
- Vitamin C 1 mg
- Calcium 12 mg
- Iron 1 mg
- Vitamin D 4 IU
- Vitamin E 0.7 IU
- Vitamin K 8 mcg
- Thiamin 0.05 mg
- Riboflavin 0.1 mg
- Niacin 5.5 mg
- Vitamin B6 0.4 mg
* Percent Daily Values are based on a 2,000 calorie diet. Your daily value may be higher or lower depending on your calorie needs.
Note
For best results, pat the chicken dry before seasoning and bake on a wire rack. This ensures even crisping and prevents soggy skin, delivering the perfect golden texture every time.
